Tiling goes wrong in four ways and every one of them is a measurement made before the first tile. A wall that is not plumb, a floor that is not level, a fall that is not there, and a datum that drifts along the run. Four tools, one for each.
Four measurements, four tools, in the order the job needs them.
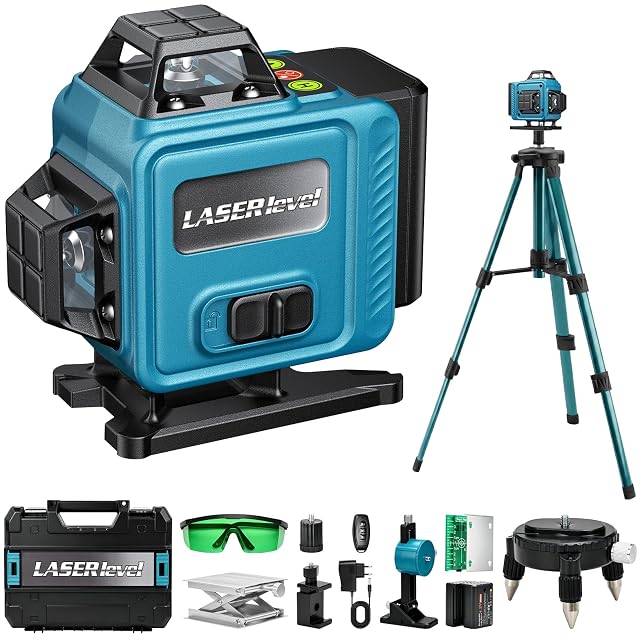
The datum: a four-plane laser
Two horizontal and two vertical 360° planes wrap the room in reference lines from one setup. The Pakinui publishes no accuracy figure, which for tiling to a laser line over a few meters is a real omission — and it is what forty dollars buys. If the tolerance matters, the Bosch AdvancedLevel 360 publishes ± 0.4 mm (0.02 in)/m.
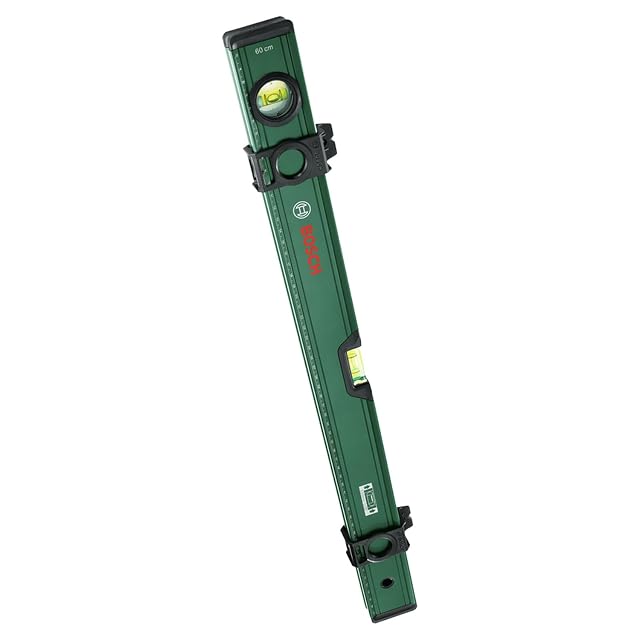
The check: a level with a rule on it
A laser sets the line; a level checks the tile against it. The Bosch 60 cm (23.6 in) states 0.5 mm (0.02 in)/m, has a printed scale so it doubles as a rule, and a V-groove for the pipes that are always in the way in a bathroom.
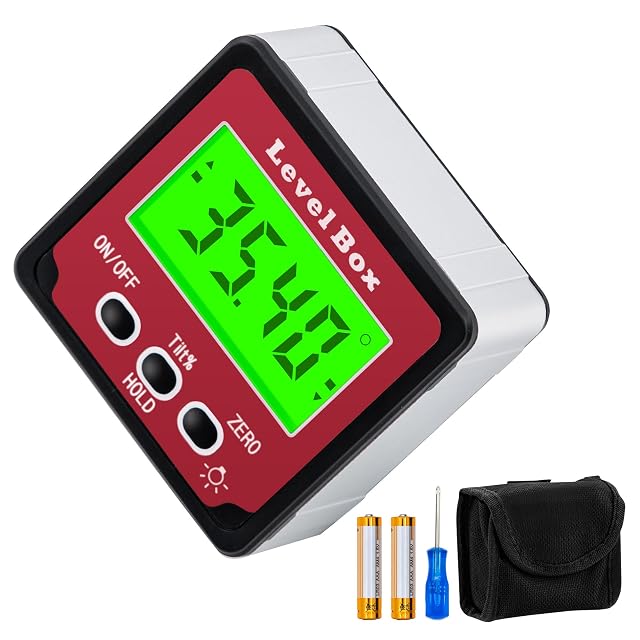
The corner: an angle gauge
Set it on one wall, zero it, move it to the other, read the difference. That is the actual angle of the corner, and cutting to it is the difference between a tight joint and a tapering gap. The Mcbazel states ± 0.2° at thirteen euros.
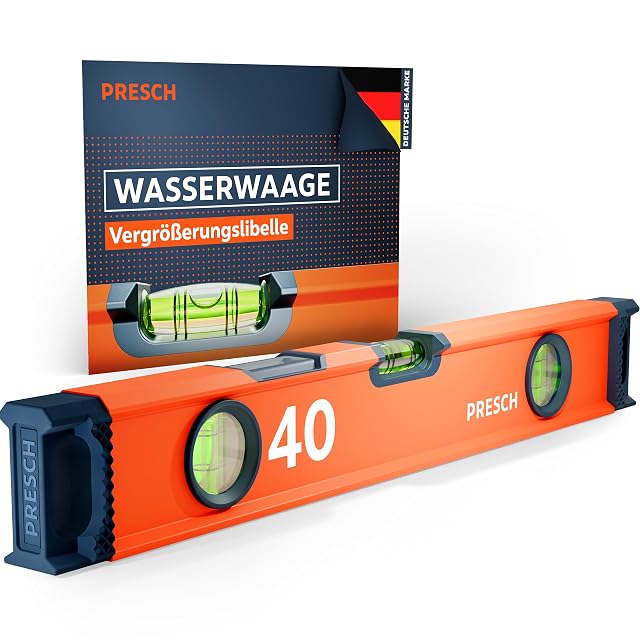
The fall: a gradient vial
Any floor that drains needs one. The PRESCH level has a curved horizontal vial with 2% gradient control, which reads the fall directly. It publishes no accuracy in millimeters per meter, so keep the Bosch for the level work and use this for the fall.
Which instrument does your work demand?
You are tiling one small wall
A tape, a level and a square cover it, plus patience with the first row.
You are tiling a floor
A cross-line laser and a way to check level across the room, because floors are rarely flat.
The room is out of square
Which it is. Setting out from a laser line rather than the wall is what saves the job.
You are cutting a lot
A good square, a reliable measuring method and a straight edge matter more than the cutter.
Picking by the measurement
Setting out the first row
The decision that everything else follows. Getting it level and centered is the whole job in miniature.
Checking the substrate
A long straight edge and a level tell you how flat the surface is before you commit, which is when it is still fixable.
Marking cuts
A square, a fine marker and a reliable transfer method. Most bad cuts start as bad marks.
Keeping lines true
A laser line or a chalk line every few rows, because small errors accumulate across a wall.
The figures that settle accuracy accuracy
A long straight edge
The tool that tells you whether the substrate is flat enough. Tiles do not hide a hollow, and a bump shows in every joint.
A level you trust
Checked by reversal before you start. A level that is slightly out puts that error into every row.
Squaring the room
Rooms are rarely square. A square, or the 3-4-5 method with a tape, tells you how far out and lets you decide where to hide it.
A line reference
A cross-line laser or a chalk line. It keeps rows true across distances where a level cannot help.
Marking that survives
A mark that wipes off with adhesive is not a mark. Something that stays visible on the substrate is worth the small cost.
Which tolerance for which work
The stage
The tool
The consequence of skipping it
Checking the substrate
Long straight edge
Lippage in every joint
Setting out
Laser or chalk line
Rows drift across the wall
Squaring
Square or 3-4-5
A visibly tapering cut row
Marking cuts
Square and a fine marker
Wasted tiles
The errors that cost you
Setting out from the wall or the floor
Neither is straight or level. Setting out from a laser or chalk line, and letting the cuts absorb the error, is what makes a wall look right.
Not checking the substrate first
A hollow or a bump shows in every tile and cannot be corrected with adhesive alone. Finding it before you start is the only cheap moment.
Trusting a level you have not checked
A level slightly out puts a consistent error into every row, and it compounds across a wall. Reversing it takes seconds.
Measuring each tile from the last one
Errors accumulate. Measuring from a fixed reference line keeps the last row as true as the first.
By the trade you are in
The first-time tiler
A checked level, a square, a chalk line and the discipline to set out before sticking anything.
The one tiling a floor
A long straight edge to find the high spots, and a laser to keep the lines true across the room.
The regular tiler
A cross-line laser, a long level and a set-out routine that starts every job the same way.
Calibration and how long accuracy holds
Tiling is hard on tools. Adhesive sets on everything, and a level with dried adhesive on its face no longer sits flat, which makes it wrong in a way that looks fine.
Clean adhesive off levels and straight edges before it sets; a lump changes the reading.
Rinse and dry steel tools; tile adhesive and grout are corrosive to them.
Recheck a level after a job on which it was dropped or knocked.
Keep the laser away from splashes and clean the emitter window.
Safety
Cutting tile produces dust and sharp edges.
Wear eye protection when cutting; chips travel further than expected.
Cutting tile dry produces silica dust; use water suppression or proper respiratory protection.
Cut edges are genuinely sharp; handle cut tiles as you would glass.
Scan walls before drilling for fixings, and be aware of pipes behind a bath or sink.
4 × 360° green · self-levels to ≤ 3° · 1/4"-20 thread · 2 × 3000 mAh
The cheapest way into a four-plane green laser: two horizontal and two vertical 360° planes, self-leveling within 3°, on two rechargeable packs. No accuracy figure is published.
Best for: A first line laser for indoor work, if you accept that the maker never says how level its lines are.
60 cm (23.6 in) · 0.5 mm (0.02 in)/m stated · V-groove · two marking sliders
A 60 cm (23.6 in) aluminum level stating 0.5 mm (0.02 in)/m, with fluorescent vials, a double metric scale that turns it into a rule, a V-groove for pipes, and two sliders for marking leveled points.
Best for: The general-purpose level for someone who would otherwise carry a level and a rule.
40 cm (15.7 in) · curved horizontal vial with 2% gradient · vertical-view window
A 40 cm (15.7 in) level specified for gradients rather than for level: a curved horizontal vial with 2% fall control, plus a vertical vial with a viewing window for reading verticals from the side.
Best for: Paving, terraces and anything that has to run away from a building rather than sit level.
Because tiling needs reference geometry on more than one surface at once — a horizontal on two walls and a vertical at the corner. A laser projecting two horizontal and two vertical 360° planes gives that from one setup, which is why the format exists.
Do I need a gradient vial for a wet room?
For a floor that has to drain, yes. A fall is set to a figure — commonly 2% — and a curved vial with that gradient marked sets it directly instead of measuring a drop over a length and packing to it.
What does an angle gauge add?
Corners are rarely square. An angle gauge measures the actual angle so cuts can be made to it, rather than assuming 90° and discovering the error at the far end of the wall.
What is the most important tool for tiling?
A level you have checked, and something to set a reference line. Everything else in a tiled wall follows from the first row.
My room is not square. What do I do?
Almost none are. Measure how far out it is, then set out so the taper falls where it is least visible, usually in a cut row against the least seen wall.
Do I need a laser?
Not for a small wall, where a level and a chalk line do fine. For a floor or a long run it keeps lines true in a way a level cannot.
Why does my substrate matter so much?
Because tiles do not hide a hollow or a bump. A long straight edge tells you before you start, which is the only point at which it is cheap to fix.
Should I measure each tile from the last?
No. Errors accumulate. Measure from a fixed reference line so the last row is as true as the first.
What marks survive tile adhesive?
A chalk line or a laser reference, rather than a pencil mark that the first trowel of adhesive removes.
Targets, tripods and spares from the same aisle, at the price we noted. Check the thread matches the instrument you pick before ordering: it depends on the mount and the part number, which the listing states.
Bosch 0601091A00 · Laser tripods — 122–295 cm (48 to 116.1 in) · aluminum · Quick Clamp height lock
DEWALT DW0881T · Laser tripods — 72 in maximum, the tallest here, collapsing to 38 in · 1/4" × 20 thread · tilting head with an INTEGRATED LEVEL · non-skid feet · aluminum · carrying pouch · stated compatible with ALL DEWALT line and spot lasers · NO minimum working height and NO load capacity published · $38
AdirPro 790-01 LD-8 · Laser receivers — THE ONLY ACCURACY BANDS ON THIS SHELF: ±1/16 in (1 mm) and ±1/8 in (2.5 mm) · 2000 ft working range, stated "depending on laser" — the only honest qualification here · ROTARY lasers only, and RED only · dual-sided LCD showing elevation, grade sensitivity, audio and battery · built-in bubble level · 9 V for about 40 hours · IP55, the highest here · $85
Bosch LR8 · Laser receivers — Red AND green · extends the GLL3-330CG or GLL3-330C to 330 ft DIAMETER, the GLL3-300 to 300 ft, the GCL 2-160 to 165 ft — the only receiver here that states the range PER LASER · ADJUSTABLE audio for worksite noise · backlit oversized LCD · dual-sided LED arrows · heavy-duty magnets · quick-release rod bracket · IP54 · $120
Bosch Professional 1608M0005C · Laser target plates — For laser distance meters · improved beam visibility · with stand
HOZO C-M02-A02 TargetMate · Laser target plates — TWENTY-NINE DOLLARS, the most expensive plate on this shelf — and the same maker's four-card set costs nineteen for four · magnetic AND washable, the only plate here that is both · stated specifically for the HOZO M-Cube 02 laser measure · NO tint color, NO scale, NO size · $29
The instruments above come from the catalog of this site. Specifications are the ones the manufacturer states and the ones on the Amazon listing; prices are the Keepa reading for the date below, and both change. Ranking uses declared specifications, stated strengths weighed against stated limits, and price. Nothing here has had its accuracy checked by us, and the page says as much.
Last checked on
Prices quoted in these summaries are dated readings. The live price is shown next to each product.
The tool we use ourselves
Chosen your tool? Now buy it at the right price.
Thermal cameras, line lasers and clamp meters swing by thirty dollars or more
across the
year, and the biggest "discounts" often land at prices the same model sold for six weeks
earlier.
UniverTrack tracks the real price history across retailers, spots fake
reductions, and alerts you when it is genuinely the moment to buy.
Real price historyBuy-now alertsAI buying assistant